

04 Aug A quick look at the Sleeklens Through The Woods workflow for Lightroom
Recently, I have been contacted by the PR Relations Manager from Sleeklens, asking me if I would test and review their Through The Woods workflow. The agreement was that I would review the workflow honestly, without bias.
As was already the case earlier (see my review of printing at zor.com), this decided me to accept the request.
Here are my first impressions about the Through The Woods presets and brushes.
To illustrate this post, I used a few images from one of my trips to Northern Aragon (Spain) and the French Pyrenees.
First of all, what do you get when you receive the Through The Woods workflow ?
As I am working mostly with Adobe Lightroom, I tested the Lightroom version of the workflow (it is also available for Photoshop but I did not test it).
The zip file I received contained all necessary files:
- A folder with 51 presets
- A folder with 30 brushes
- Several pdf documents such as the terms of service, a recipe list (examples of use of the presets and brushes), and the description of the installation of the presets and brushes
These last two files are actually a bit strange as they are named in a different way and also describe the installation of the presets and brushes each in a different way. What I mean is that, for the presets, the pdf sends you to a YouTube video for the installation details while, for the brushes, you simply follow the written description in the pdf. Nothing really bad, but it left me wondering if I was not missing a file. I think that uniformising the names and descriptions for the pdf files would make the procedure more obvious.
One important detail about the terms of service is that the use of the workflow files (presets and brushes) is limited to one user (pro or non-pro alike). Although this is not explicitly said in the terms, I suppose that it means that you can install and use them on several machines as long as you are the only one using them.
Once the presets and brushes were installed (very easy by following the indications from the pdf or video), they appeared as a list of presets and a list of brushes in the respective panels.
The presets are grouped in 7 different families, numbered from 0 to 6, the first one (12 presets, named starting with a 0) containing general develop settings that are meant to be used as a general base that you can then modify further with brushes, for example. The 6 remaining groups (with 4 to 12 presets, named starting with 1 to 6) are presets that, according to the workflow system of Sleeklens, you may combine as you wish, in the order of their numbers, to modify develop settings corresponding to their name.
The presets groups of the Through The Woods workflow are the following:
- 0 – All In One
- 1 – Base
- 2 – Exposure
- 3 – Color/Color Correct
- 4 – Tone/Tint
- 5 – Polish
- 6 – Vignette
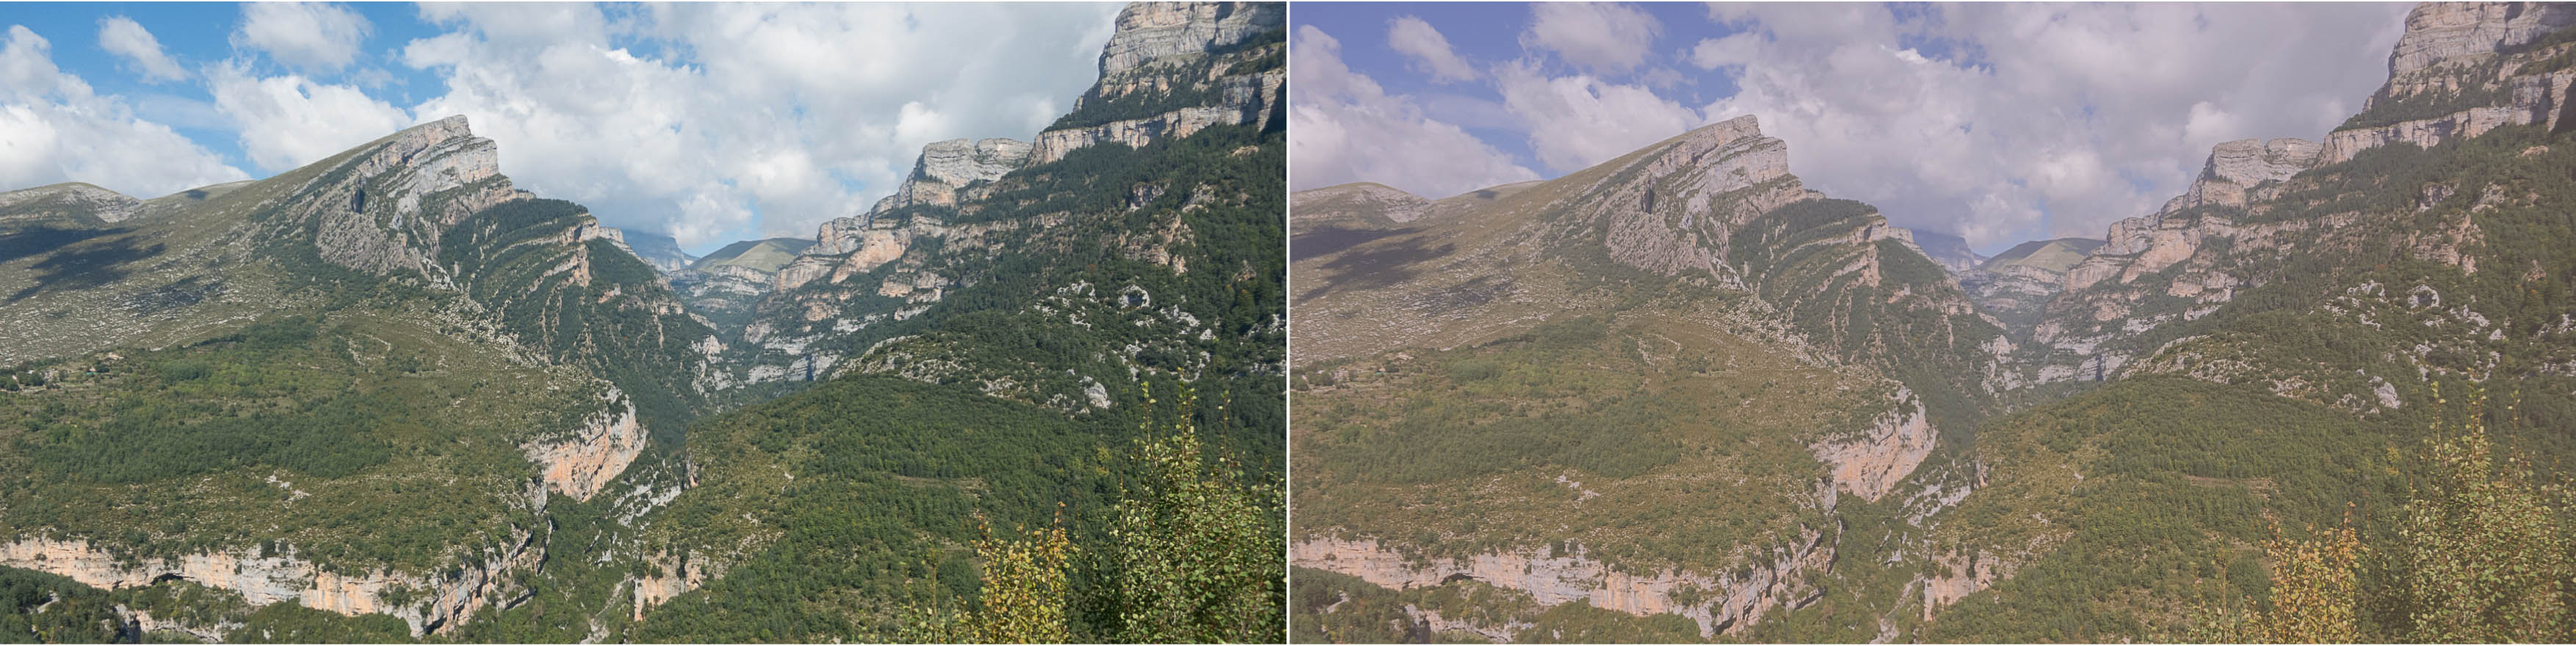
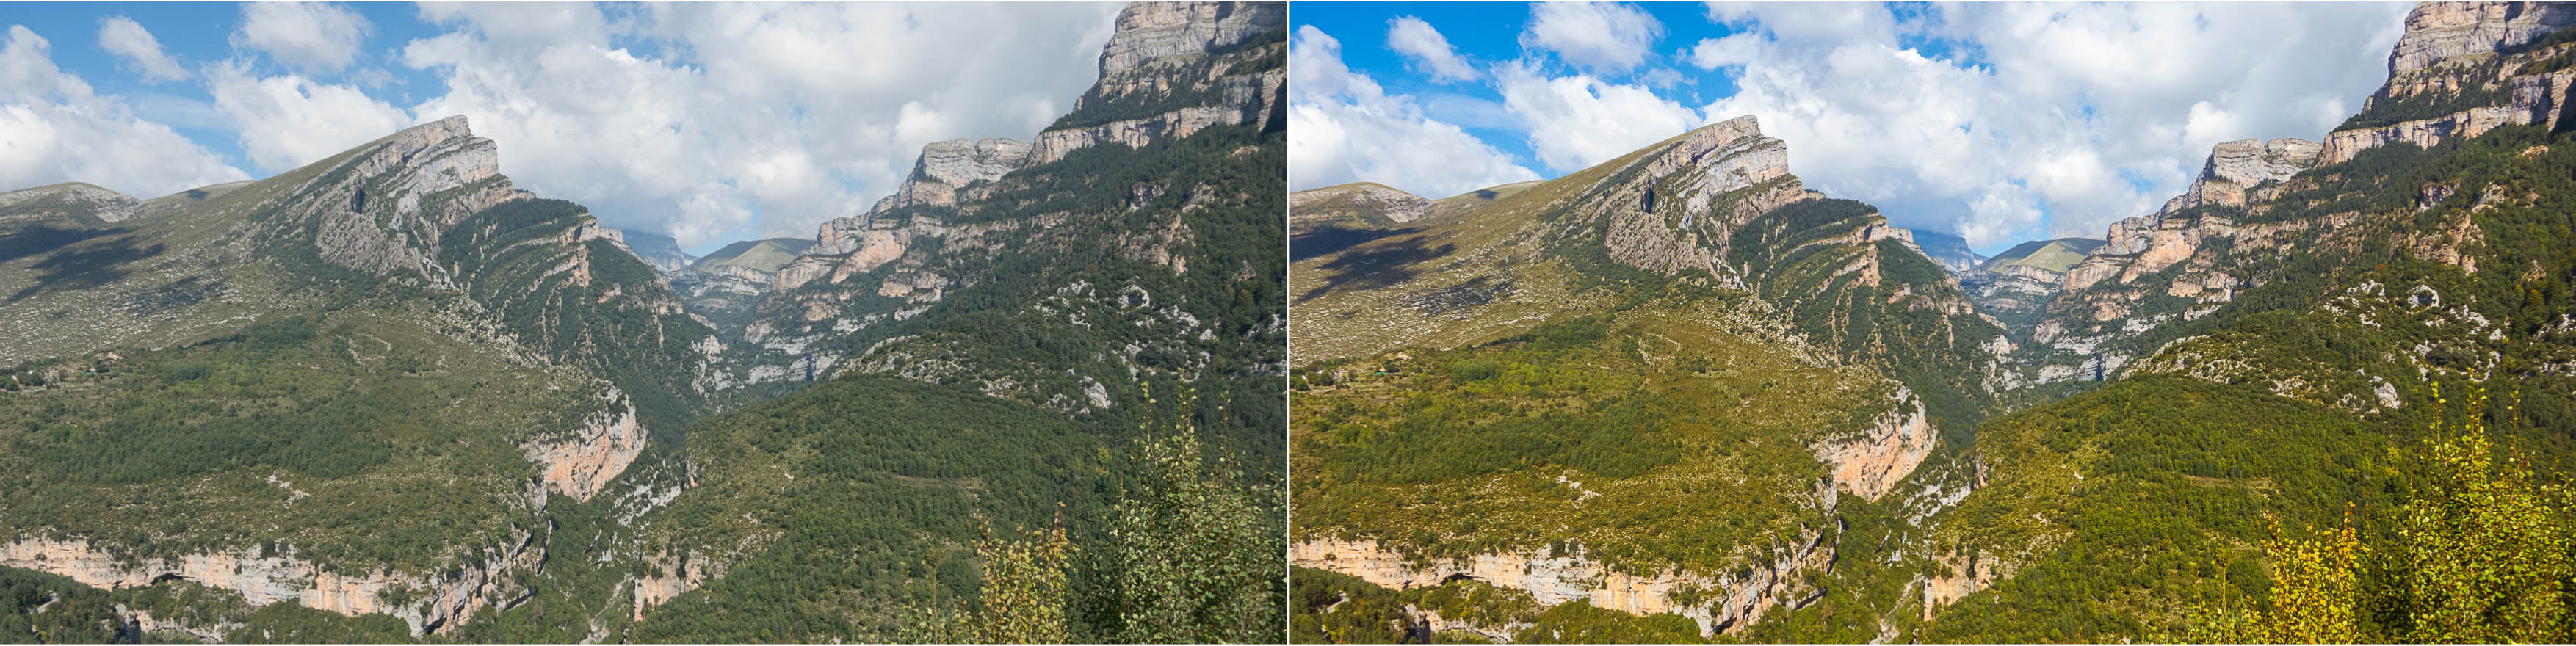
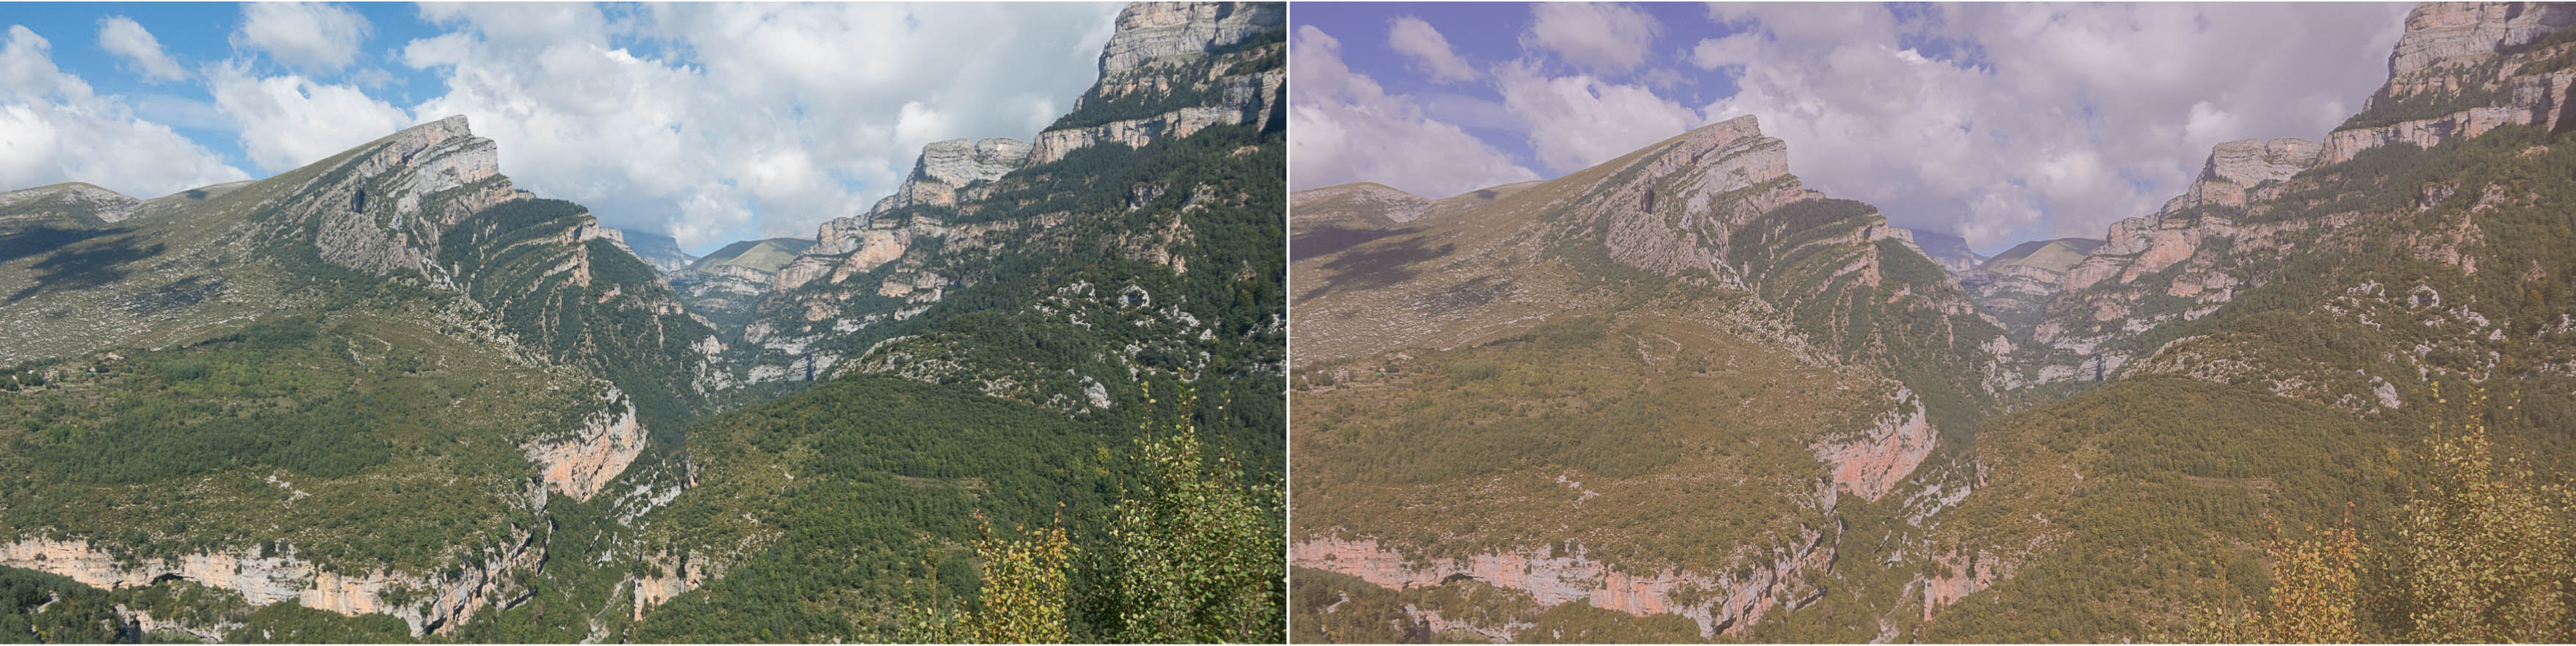
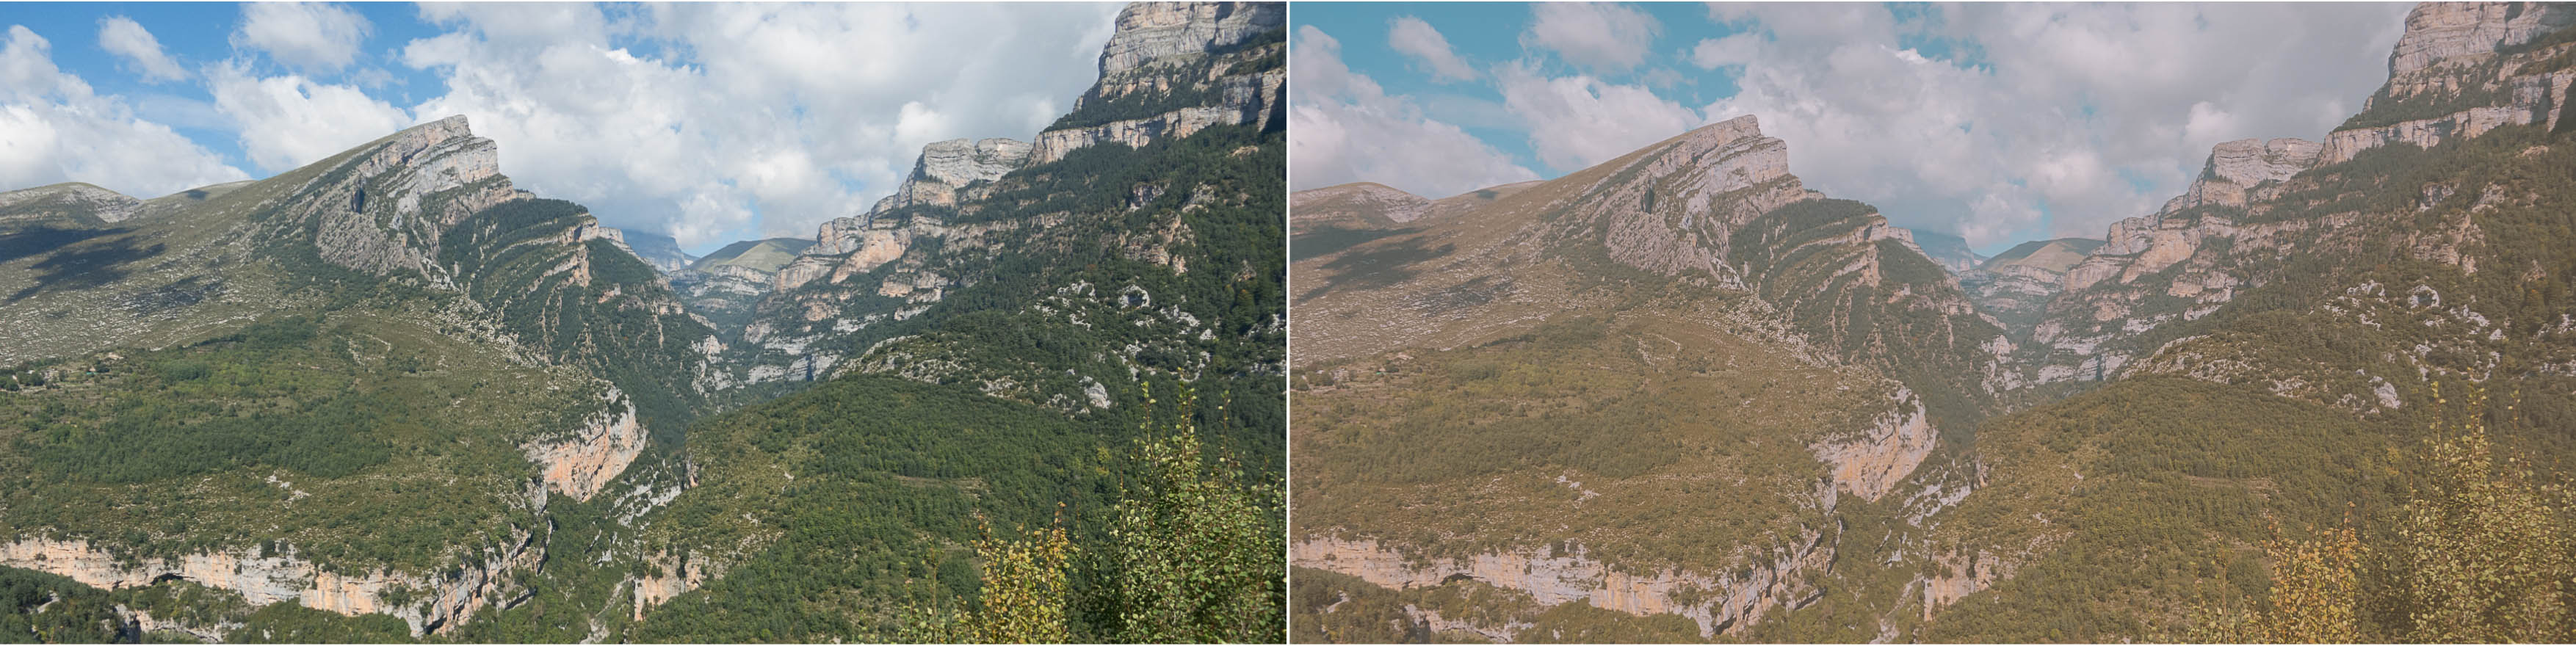
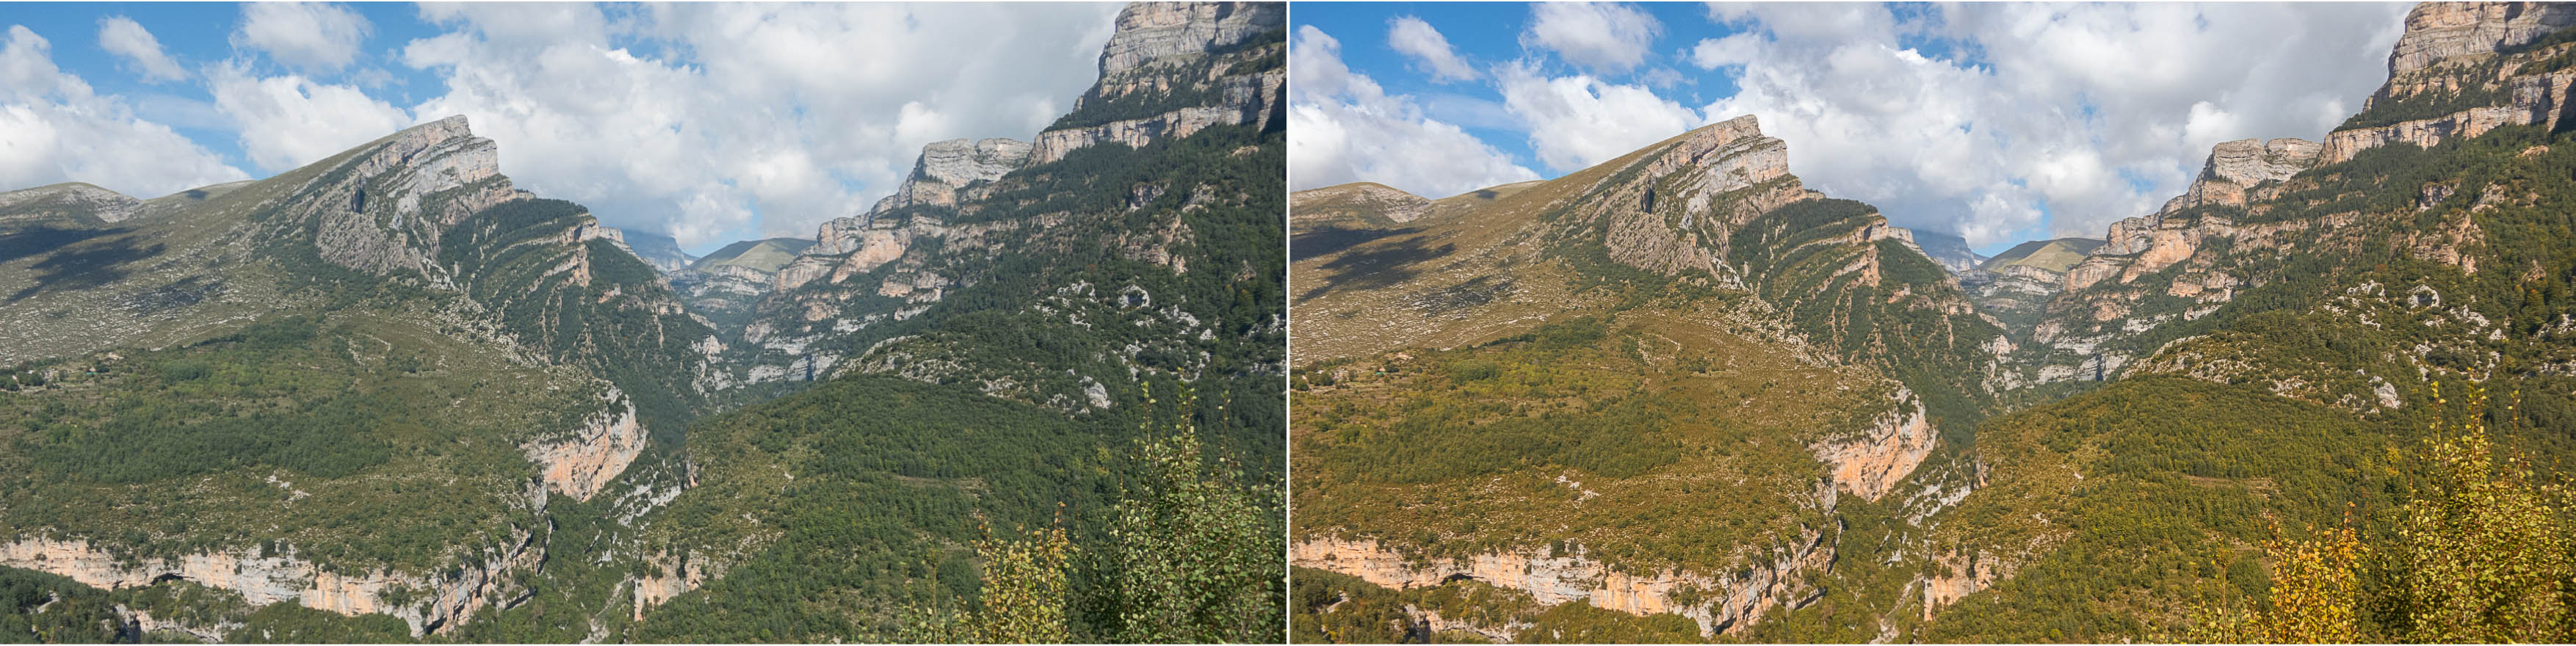
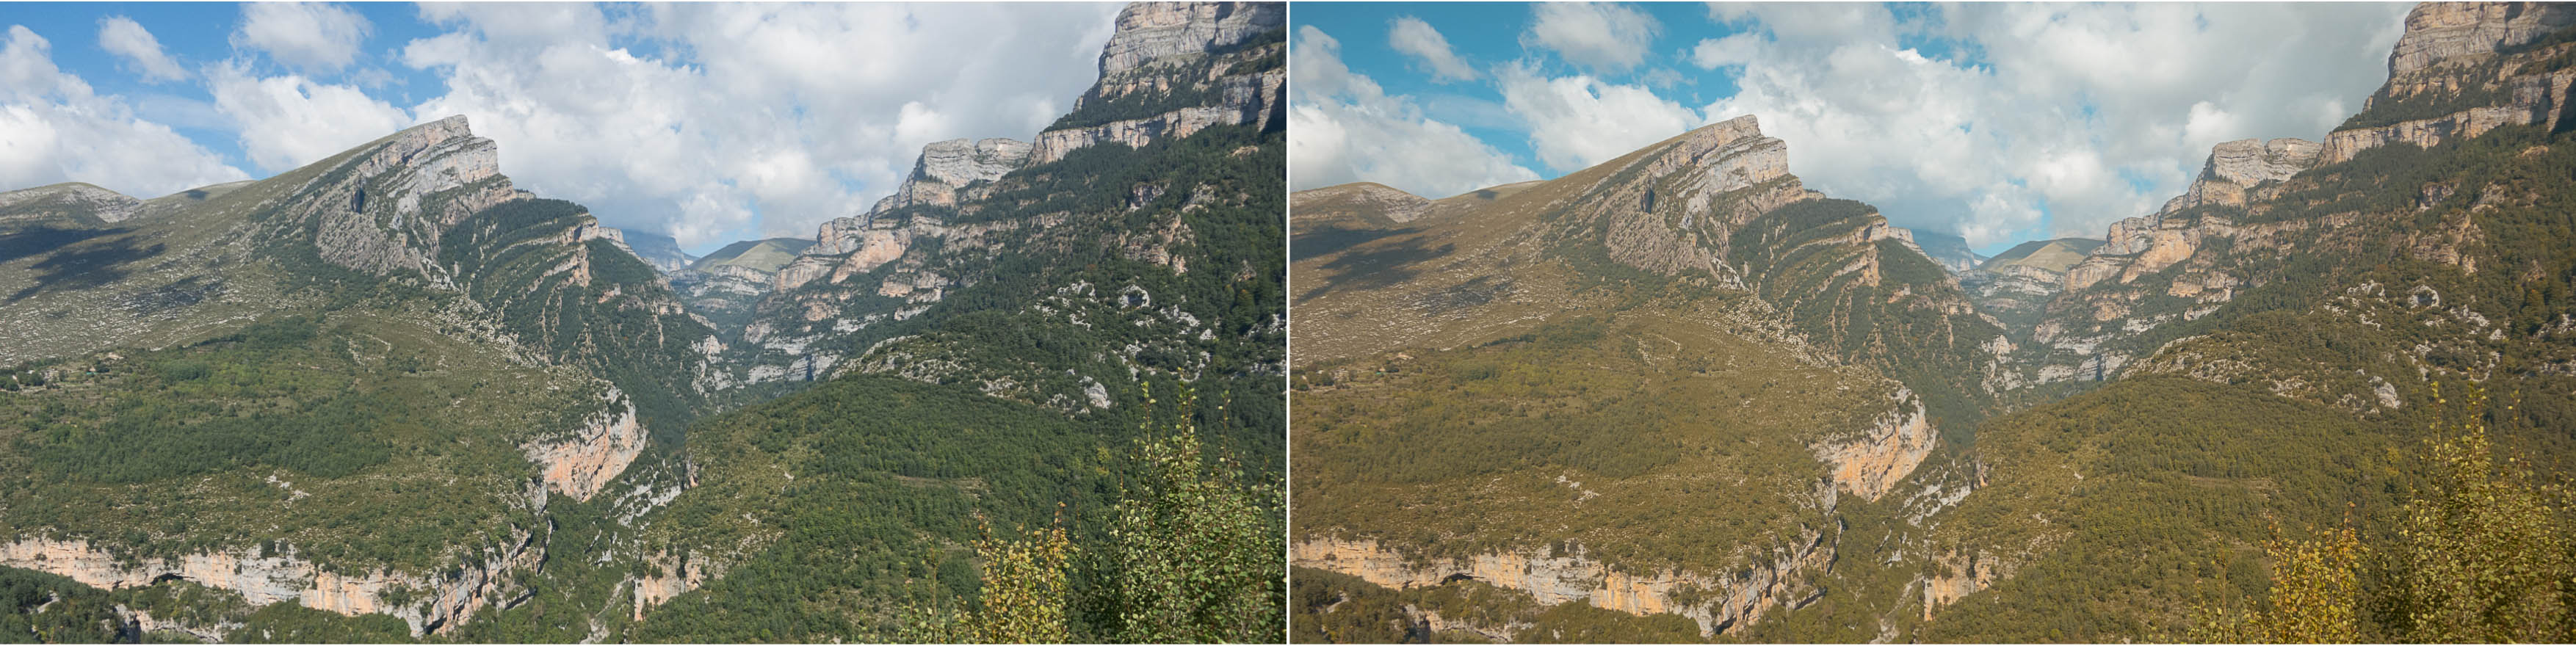
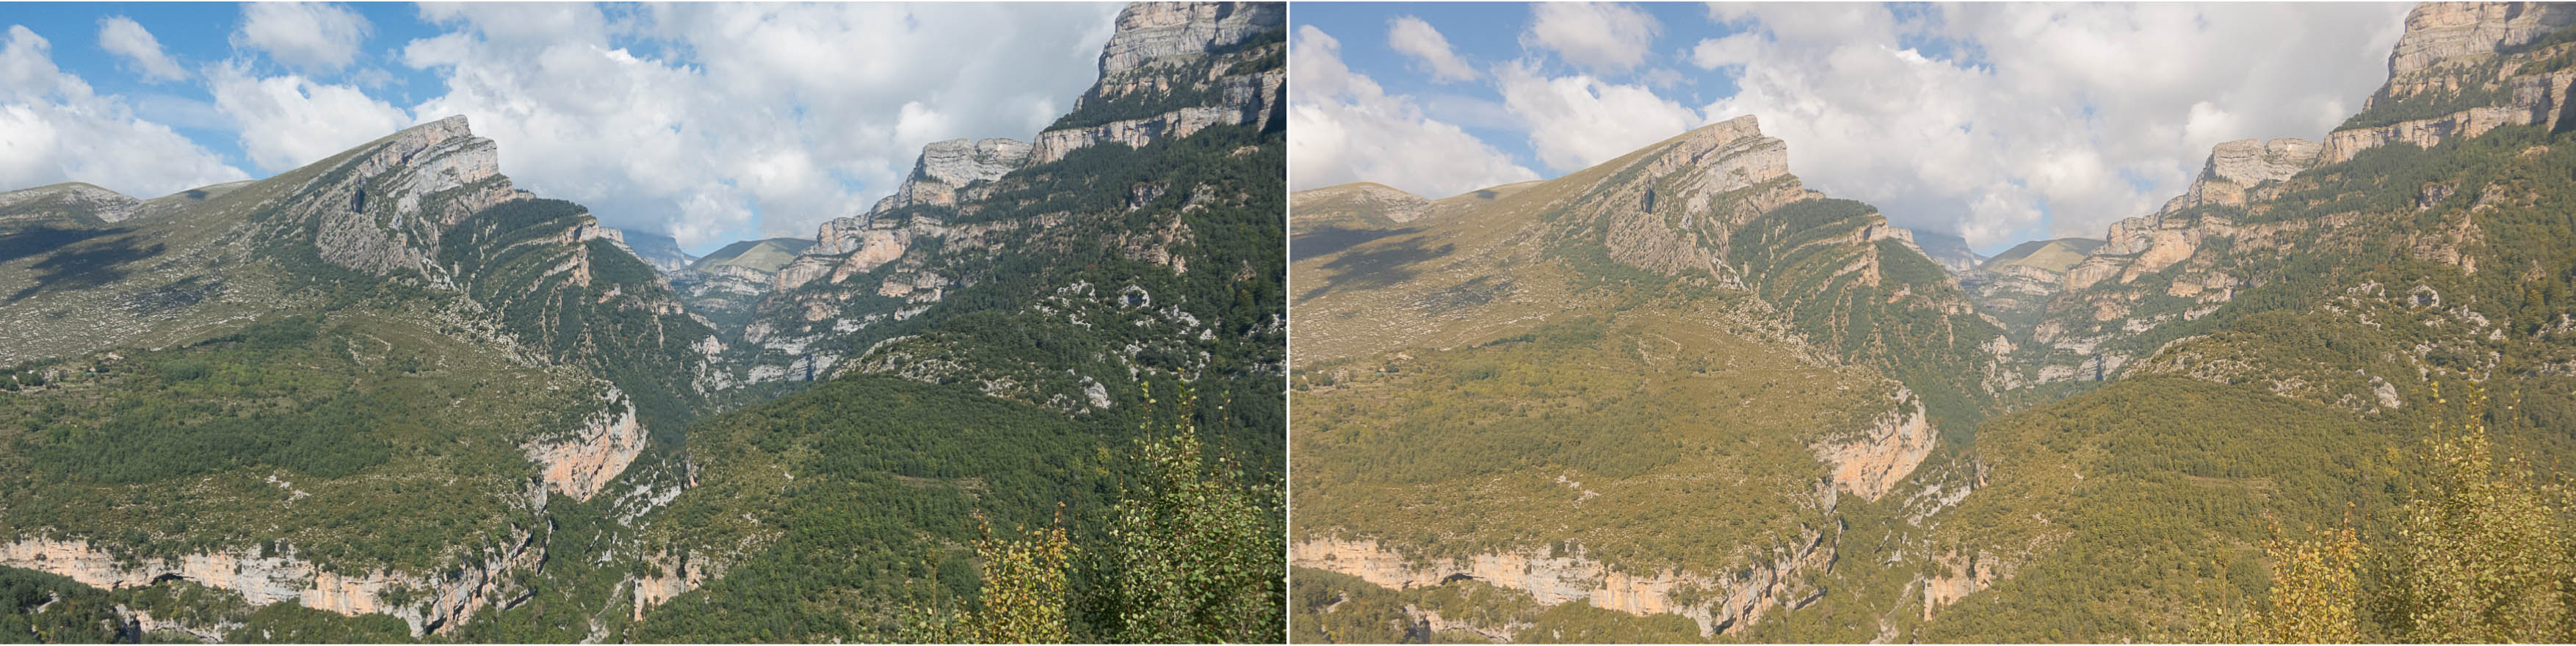
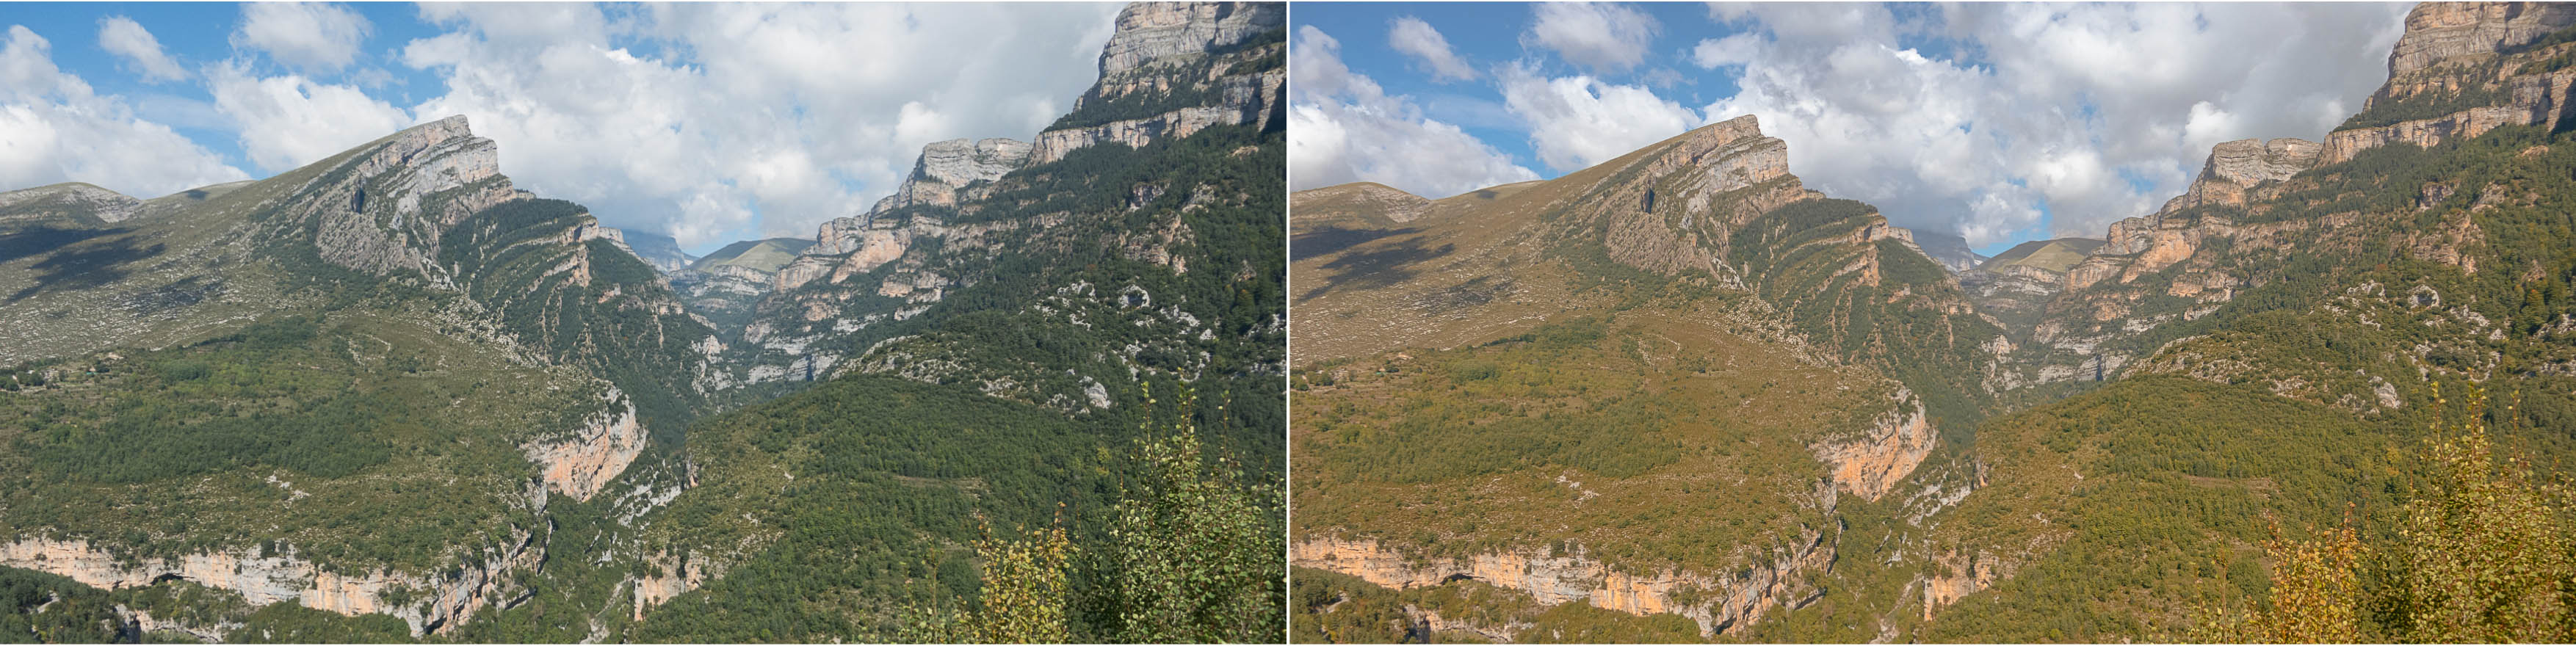
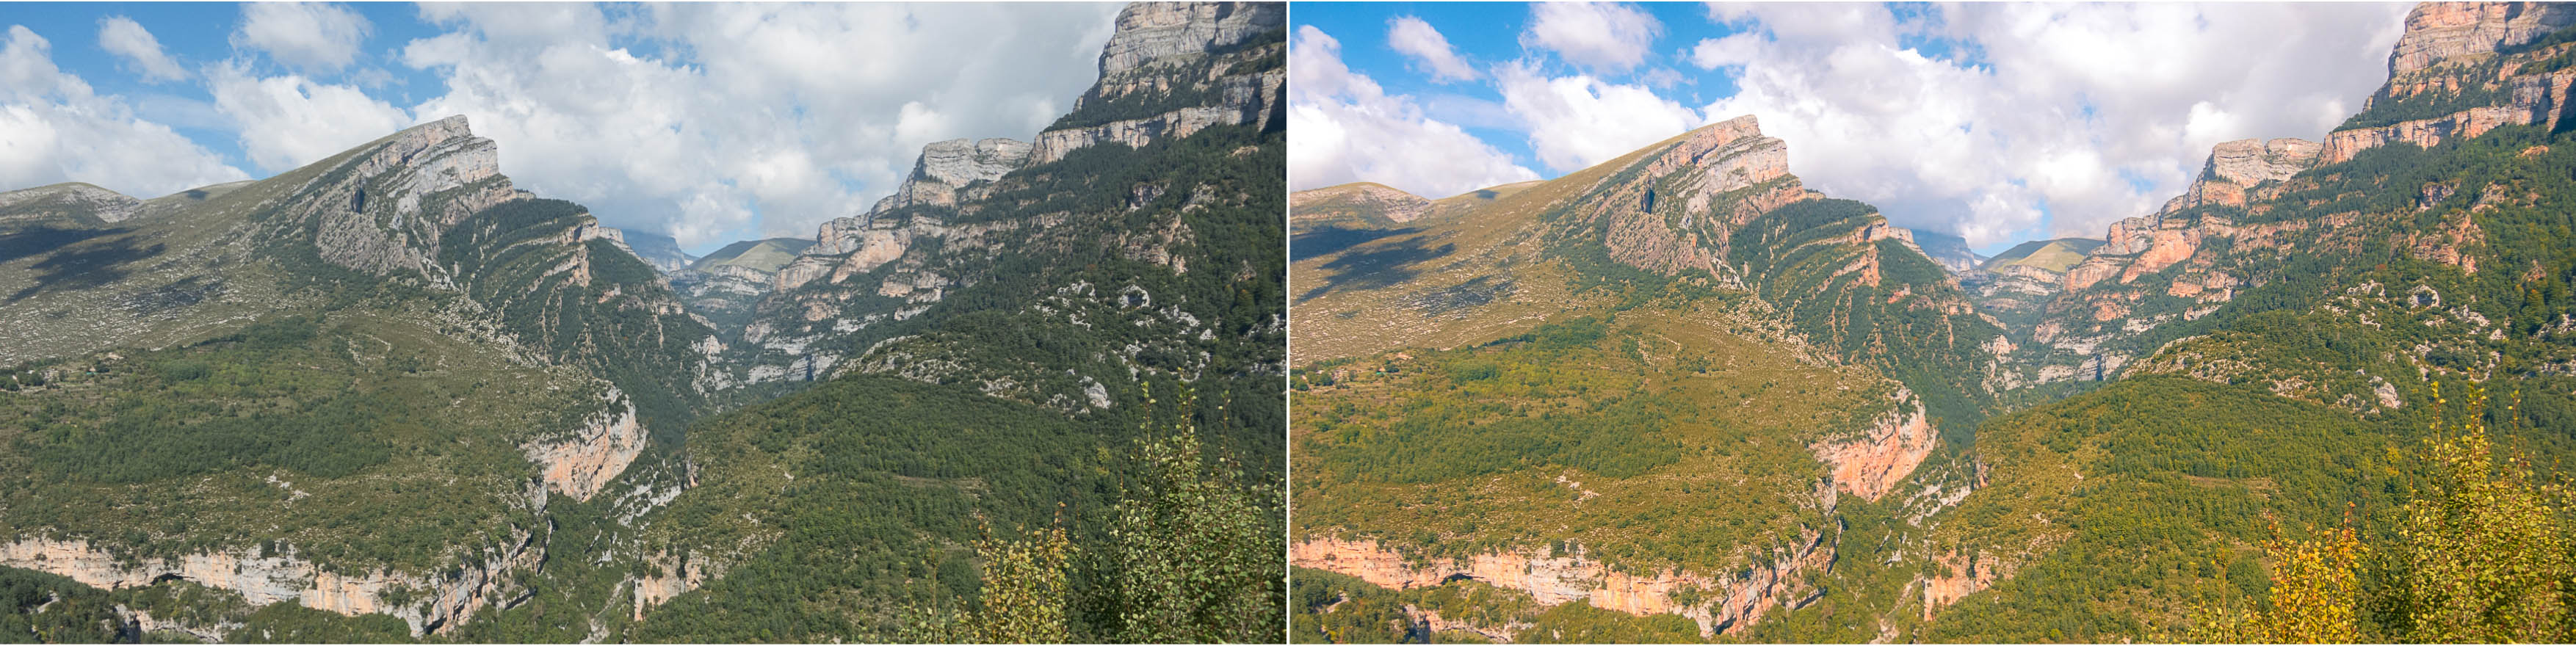
To show you the effect of the All In One presets, here are 12 versions of the same RAW image of the Anisclo Canyon, in the Ordesa and Monte Perdido National Park (Aragon, Spain), where I applied the All In One presets. In each case, the left image is the base RAW file, without modification.


Of course, presets are only meant to be used on the whole image and further fine-tuning is often necessary by using adjustement brushes, graduated filters, or radial filters. The 30 brushes of the Through The Woods workflow are available to help you for this too.
Again, they are grouped according to the type of effect that they will have on your develop settings:
- Basics
- Color
- Effects
- Haze
- Light
I usually do not rely too much on “standardized” presets or brushes, preferring instead to work with my own targeted development settings as I think that each image has its own requirements. But, in order to give you an idea of what can be achieved using the combination of the presets and brushes, I did a quick and dirty test, by developing a few images in just 3 “clicks”: one All In One preset followed by two brushes/filters. Nothing more, except for a little bit of tweaking the effect of the brushes. Here are the results (each time, compared with the original RAW image):
For this image, I used:
- Warm Shadows
- Contrast/Clarity
- Water Definition
- OK… Here I cheated a bit, I added a graduated filter (Darken)
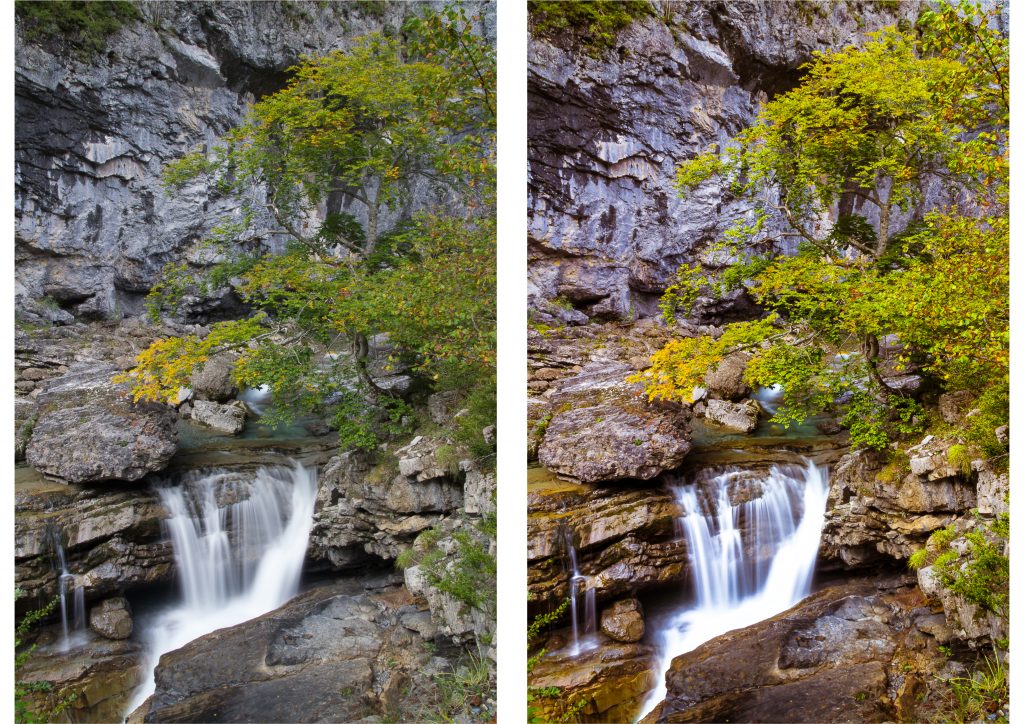
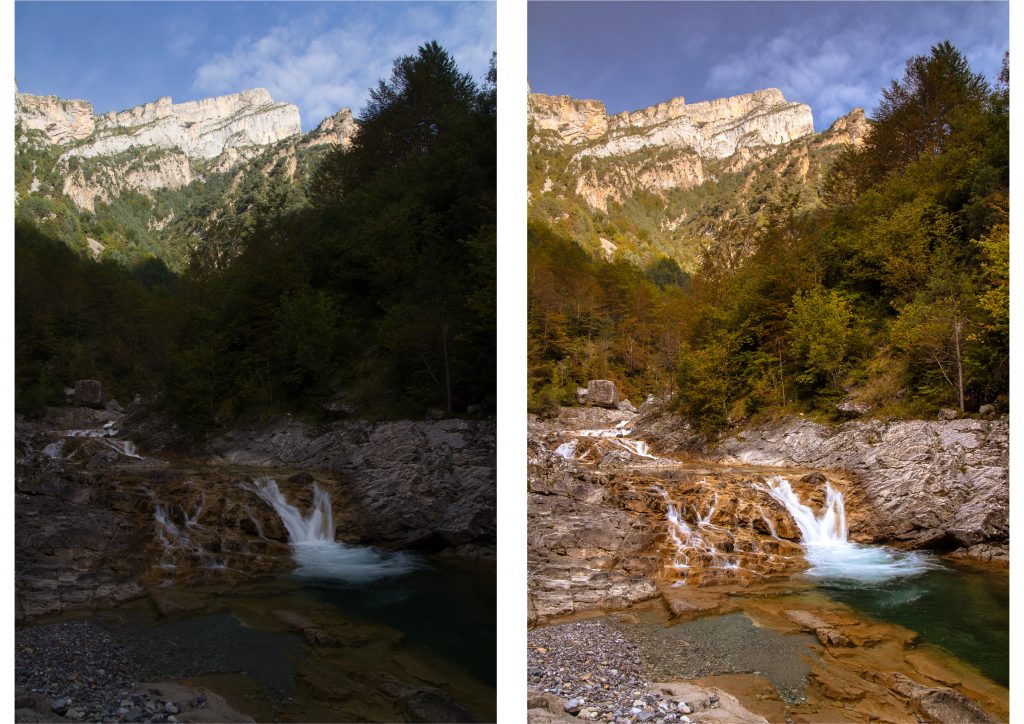
Waterfall and tree (Before – After)
Here, I used:
- Dawn Rising
- Contrast/Clarity
- Brighten
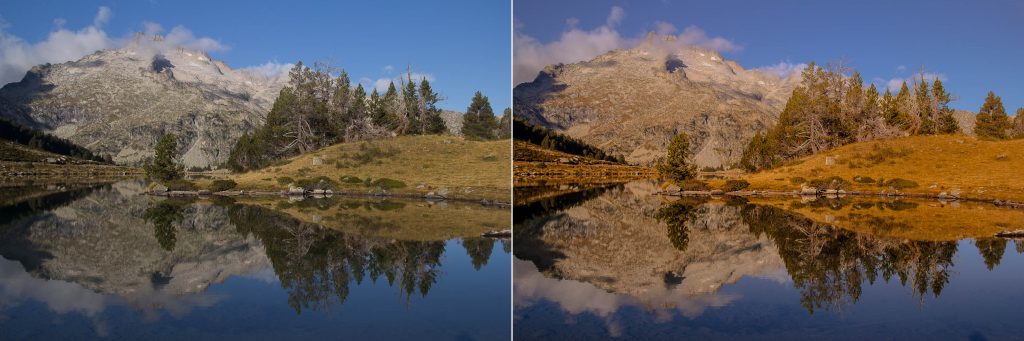
Waterfall and Mountain (Before – After)
For this image, I used:
- Dawn Rising
- Contrast/Clarity
- High Saturation
Neouvielle – Aumar (Before – After)
The following one was developed with:
- Shine Into Sunset
- Cloudy Sky Definition
- Contrast/Clarity
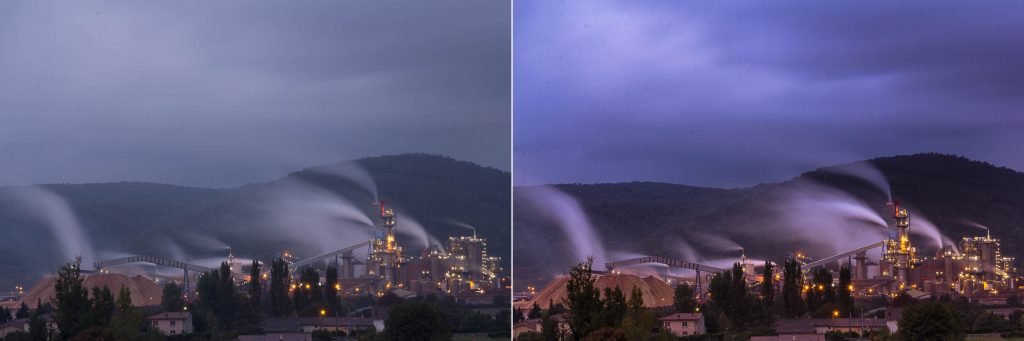
Factory at night (Before – After)
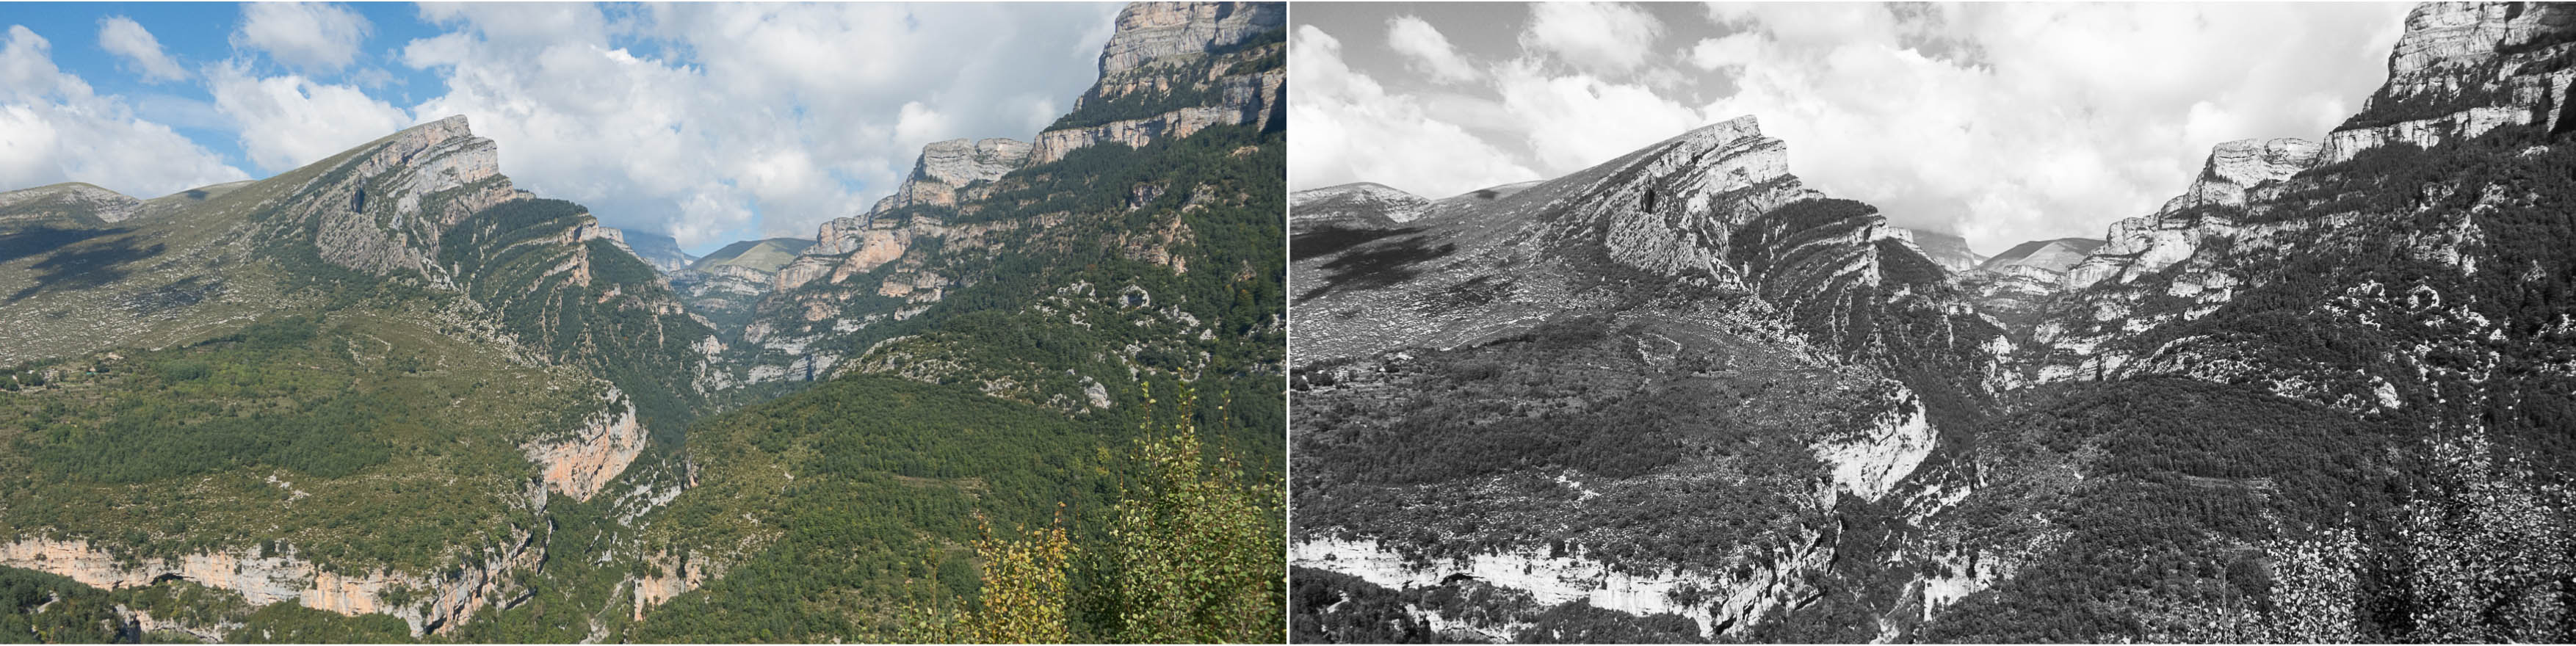
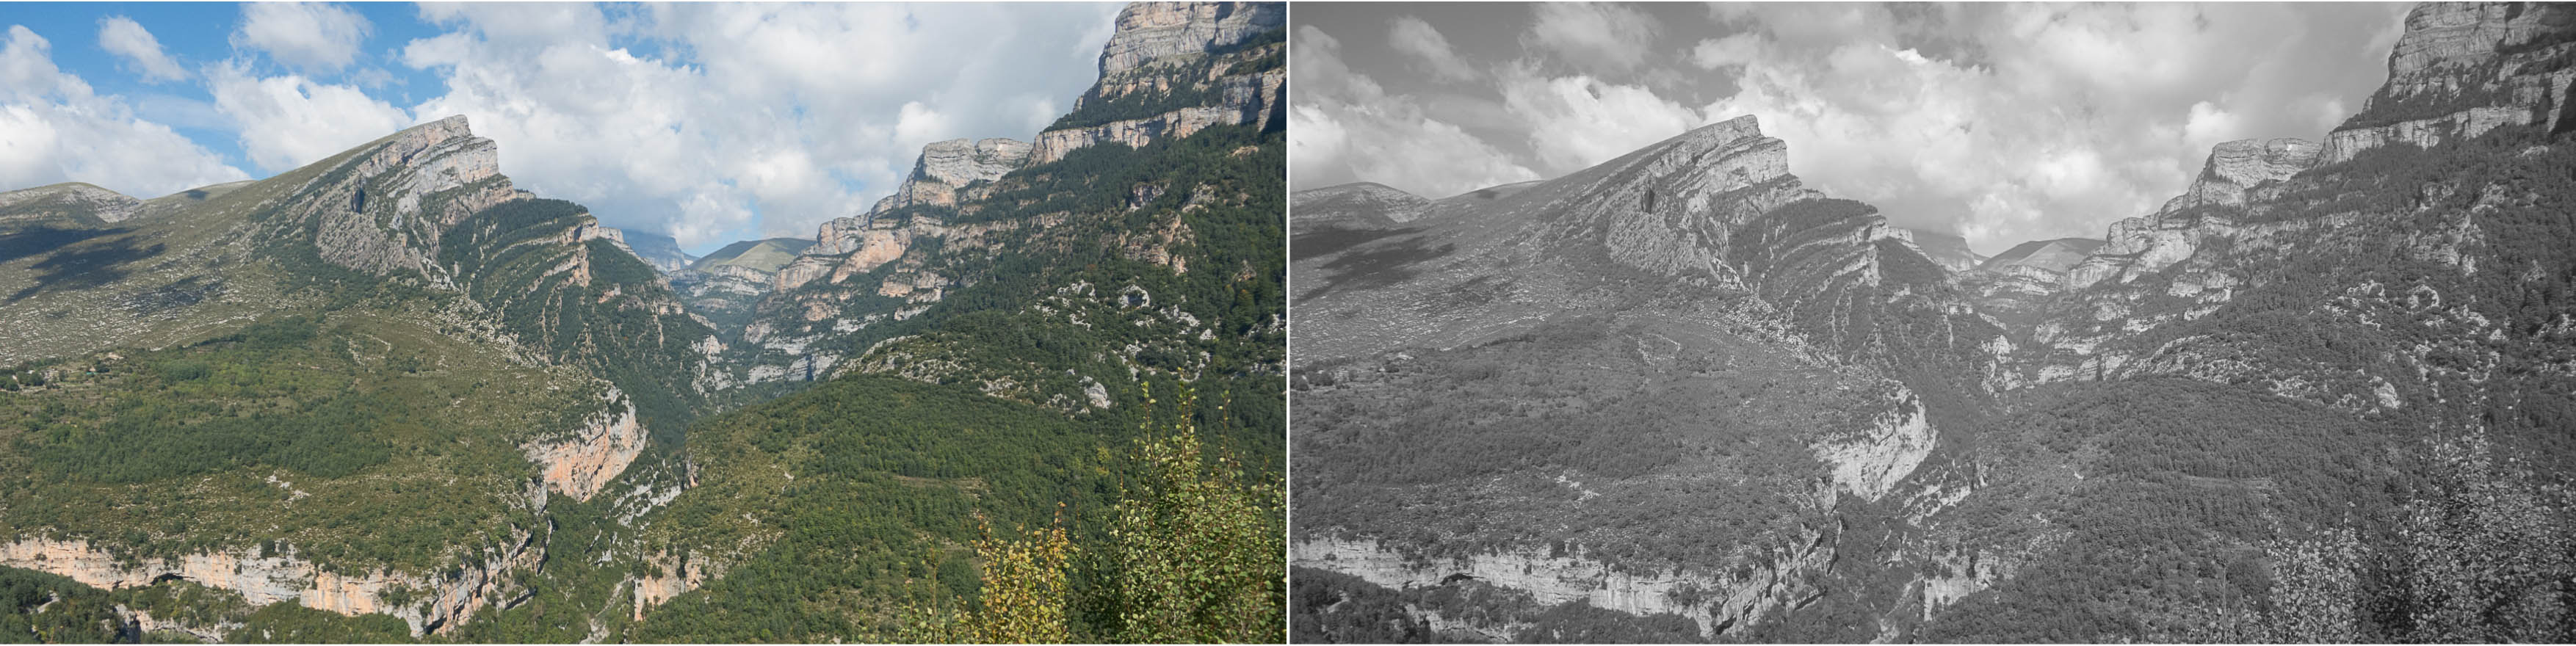
The next two images were more extensively fine-tuned, but still using the Through The Woods presets and brushes. For this black and white conversion of the Neouvielle peak reflected in Lake Aumar, I used the stepwise presets workflow followed by just two brushes:
- 1-Base – Monochrome Fantasy
- 2-Exposure – Darken Shadows
- 3-Color – Deep Blue Skies
- 5-Polish – Add Clarity
- 6-Vignette – Subtle Black
- Contrast/Clarity brush for the sky
- Water Definition brush for the lake
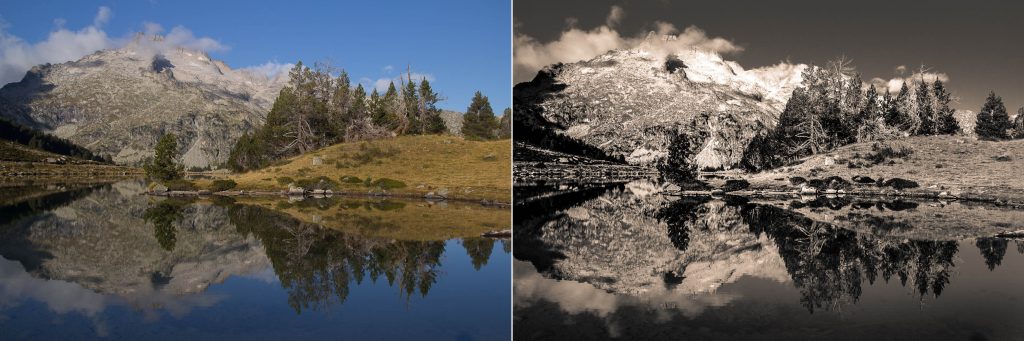
Neouvielle – Aumar – Black & White – (Before – After)
And for this final one, I used the following:
- 1-Base – High Dynamic Range
- 4-Tone/Tint – Warm It Up
- 5-Polish – Add Clarity
- 6-Vignette – Subtle Black
- and several brushes (that I forgot to note…)
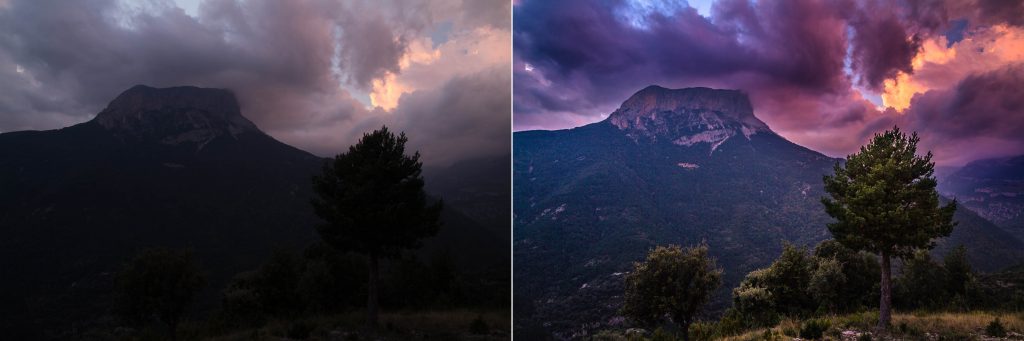
Clouds at sunset (Before – After)
In general, I found the Through The Woods presets and brushes useful as a basis for the development of landscape images, even if I found some of the effects a bit too strong. In particular, effects such as Color Pop or Vignette were, according to me, exagerated. Fortunately, you can always fine-tune them by reducing their effect. Also, I found that the generic sharpening introduced by some of the presets was too strong to my taste. I personally think that sharpening should be adapted according to each camera. Using several cameras with various sensor sizes (compact, APS-C, or full-size), I have saved my own presets for sharpening adapted to each camera.
As already said earlier, I am usually not using many presets but my feeling is that the Through The Woods presets and brushes are of very good quality. And they will probably make me use presets a bit more often, especially when I will need to quickly develop images, as they help in spending less time in front of my computer!


No Comments